• Welcome to the Checkmate Community Forums forums.

    You are currently viewing our boards as a guest which gives you limited access to view most discussions, articles and access to our other FREE features.
    By joining our free community you will be able to:

    » Interact with over 10,000 Checkmate Fanatics from around the world!
    » Post topics and messages
    » Post and view photos
    » Communicate privately with other members
    » Access our extensive gallery of old Checkmate brochures located in our Media Gallery
    » Browse the various pictures in our Checkmate photo gallery

    Registration is fast, simple and absolutely free so please, join our community today!

    If you have any problems with the registration process or your account login, please contact support by clicking here or by using the"contact us" link at the bottom of the page.

jeff,s enchanter resto

Status
Not open for further replies.
Really? Are you serious? I'm not going to hijack Jeff's thread but that's insane to say something like that. Have you seen bigredinohio, SamIam, groundloop, Wildman, yellowfiero88, JTPotroni and a few other's work? Most of us don't have 40 yrs in the boat building business and don't have a 10,000 sq. ft building to work in either. I think all the guys here have done a hell of a job on their restos, not perfect but are great. However I do agree that Jeff's work is among the best. Oh and I'm not mad I just think that comment was over the top for the DIYer's.:D

oh...and Robbie, i only have a 5000 sq. ft shop :banana:...OG, I dont have to heat it here... still 65 degrees out...ha! :D
 
oh...and Robbie, i only have a 5000 sq. ft shop :banana:...OG, I dont have to heat it here... still 65 degrees out...ha! :D

LOL!!!! Good for you!!! I have a carport and don't need heat either it was 81* over the weekend!!!:poke: 
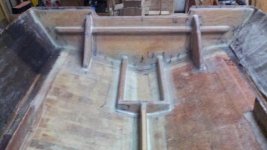
The boat is coming along nicely!!!:thumb: 
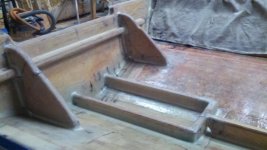
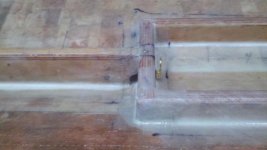
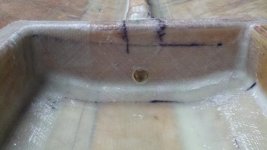
I did learn something new, didn't know the deck had some type of foam. I wonder if you can add some stiffners underneath to stop the bowing in?
 
Very nice work Jeff... I don't know much about the installation of Fiberglass, but I do know a thing or two about craftsmanship. I have been watching since day one, when you found her full of water, and you have done a very good job on your restoration. Your fabrication and joinery is nearly perfect!

I was hoping this wouldn't be me when I tore into mine, and thankfully it's not.

Keep up the good work and from one carpenter/perfectionist to another...Great job:bigthumb:

thank you for the compliment...I believe in doing things once...this is why i was so upset to see the water after i replaced the floor 3 years prior...I think i got a solution. check this out. I installed the stringer, 2 layers of 3/4 inch marine ply laminated, with a 3/4 inch ply running the opposite way on the top for straightening, I made the bilge well,( that was only 6 inches off the transom from the factory,) longer so it will extend under the seat and at the bulkhead, i installed a brass transom plug...all this was layered to the core/pad with 17 oz. bi-axle. Been using cabosil like its water...:D check out the pics...the floor was made to day and I used a thick 150 epoxy on the bottom....
 

Attachments

  • stringer replacement 002.jpg
    stringer replacement 002.jpg
    74.8 KB · Views: 245
  • stringer replacement 011.jpg
    stringer replacement 011.jpg
    40 KB · Views: 86
  • stringer replacement 012.jpg
    stringer replacement 012.jpg
    38 KB · Views: 83
Last edited:
It looks fantastic Jeff. I'm not looking forward to the day when I've got to do this to mine and while I'm fairly certain that day is still a long way off I'm a lot less scared of it after watching what you've done with yours. While I'm at it I want to thank O.G. for his input on this project of yours, he might not realize it but it is helping a lot more of us than just the one doing the job.

John
 
Jeff, it is really coming together, but I have one question. Does the brass transom plug in the bilge well create a bump in front of the bilge well where the center stringer is notched? Your work looks fantastic, but I would think it will now hold water in front of the bilge well if there is a bump.

If it does, maybe you could feather that area out with a layer or two of additional glass?

BTW... I really like your plywood topper/cap to straighten out the stringer:bigthumb:
 
Dawg , ( Jeff ) once again L@@king g@@d very clean and simple no frills or razzle dazzle..............very nice work :poke: grasshopper , and thank god for Cabosil ....... hey .....:lol::lol: Jeff , i apologize for not getting back with you earlier this week just trying to wrap up a few things ...if you know what i mean, and will give you a call tomorrow but non the less .....once again ......very nice work , and that is how it should be done with everything fully encapsulated with no bare wood exposed along with the brass transom plug which is a very nice touch , and just a quick mention dont forget to seal the weep hole ahead of your plug which most likely you have already done .:bigthumb:
 
Jeff, it is really coming together, but I have one question. Does the brass transom plug in the bilge well create a bump in front of the bilge well where the center stringer is notched? Your work looks fantastic, but I would think it will now hold water in front of the bilge well if there is a bump.

If it does, maybe you could feather that area out with a layer or two of additional glass?

BTW... I really like your plywood topper/cap to straighten out the stringer:bigthumb:

Hey Ram, I know what you mean...the brass insert is set thru the bulkhead and set into place with sealer and then it was forced tightly with a special flaring tool.
The brass insert or 1 inch hole is about 1/8 above the pad, this was safest structural way to install it. So yes the water will only come out if I tip the boat. I only plan to use this method twice a year...if at all....just for inspection purposes...im not worried about a small amount of water now that i have this thing water tight...I shouldn't be getting any thing in there when im done.......may even be over kill, but after what happened last time.:irked:
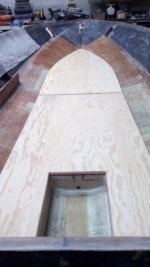
..but maybe a little feathering cant hurt....:)
 

Attachments

  • stringer replacement 024.jpg
    stringer replacement 024.jpg
    45.4 KB · Views: 81
  • stringer replacement 004.jpg
    stringer replacement 004.jpg
    57.7 KB · Views: 77
  • stringer replacement 016.jpg
    stringer replacement 016.jpg
    34.6 KB · Views: 79
Last edited:
Dawg , ( Jeff ) once again L@@king g@@d very clean and simple no frills or razzle dazzle..............very nice work :poke: grasshopper , and thank god for Cabosil ....... hey .....:lol::lol: Jeff , i apologize for not getting back with you earlier this week just trying to wrap up a few things ...if you know what i mean, and will give you a call tomorrow but non the less .....once again ......very nice work , and that is how it should be done with everything fully encapsulated with no bare wood exposed along with the brass transom plug which is a very nice touch , and just a quick mention dont forget to seal the weep hole ahead of your plug which most likely you have already done .:bigthumb:

Hey OG, no worries, call when you can. and yes, used a good amount of cloth and epoxy in that area..I sealed the brass insert with 5200 before I used the flaring tool, then epoxied it in as well.... I may add a layer of cloth to feather out any drainage as Ramifications suggest..:lol:
 
Thanks for the reply Jeff. I figured you had the bases covered just looking at all of the other craftsmanship that went into your boat, along with professional advice. It was hard to tell the offset/elevation from the pics posted.

On another note, I remember replacing the brass flared piece on my Whaler 15 years ago with my dad. I remember it not being the easiest thing do, but than again I was only 13 years old...

Again, outstanding work:bigthumb:
 
Why the extra plug? If water gets in, won't it be trapped. Why not just a smooth run from bow to stern? Pull the stern plug at the ramp drive home and anything in there should come out and allow air to move thru to vent it.
 
I was gonna ask the same question but I think the plug would help keep water out that may get in if a wave breaks over the back of the boat or something. Also if you do something like forget to put the plug in when launching it'd stop that water that is coming in the transom plug from making its way up there. I would just take both plugs out when I got the boat on the trailer.

John

Exactly John, I dont think were meant to get water under the floor, and shouldn't. So originally there was no way to drain the underneath of the floor and if it stays dry, no need to. Unfortunately, over the years of attaching thing improperly, we get holes that shouldn't be there...or a crappy installation of factory foam under the floor then the holes used to install the foam weren't sealed properly back in 1981. Im finding most issues like these are self inflicted. I installed the hole to drain anything if it should get in (dont know how now :)) and I install the plug it self so water wont rush up from the bilge area in any situation...
 
Thanks for the reply Jeff. I figured you had the bases covered just looking at all of the other craftsmanship that went into your boat, along with professional advice. It was hard to tell the offset/elevation from the pics posted.

On another note, I remember replacing the brass flared piece on my Whaler 15 years ago with my dad. I remember it not being the easiest thing do, but than again I was only 13 years old...

Again, outstanding work:bigthumb:

It wasnt hard with the right tool....but i can see if you didnt have it or if the transom isnt parallel inside to out how it could be a pain. I though hard and researched the best method. What made me go brass was when i took my old transom out the upper raised lip transom drain hole was a plastic insert, and thats were most of the rot was...the lower bilge hole was brass and was the most solid part of the transom...
 
Status
Not open for further replies.
Back
Top