• Welcome to the Checkmate Community Forums forums.

    You are currently viewing our boards as a guest which gives you limited access to view most discussions, articles and access to our other FREE features.
    By joining our free community you will be able to:

    » Interact with over 10,000 Checkmate Fanatics from around the world!
    » Post topics and messages
    » Post and view photos
    » Communicate privately with other members
    » Access our extensive gallery of old Checkmate brochures located in our Media Gallery
    » Browse the various pictures in our Checkmate photo gallery

    Registration is fast, simple and absolutely free so please, join our community today!

    If you have any problems with the registration process or your account login, please contact support by clicking here or by using the"contact us" link at the bottom of the page.

Tri-mate 2 over haul.

I think you should smooth up the deck, it would look cool. Something like this:

trimategus2.jpg
 
I hear ya coop. I went the other way. Handrail is gone and all the holes filled, running lights both front and rear gone, holes filled.
Front center cleat, yep you gussed it, gone holes filled. I am installing black pop up cleats on the front and rear.
Paint the gills black, winshield is chopped and will be painted black also.
 
Ok, now I usderstand the "cs" part of your question. No, don't have that one. Just Photoshop 7.

Thanks for the link.
 
Originally posted by wickedrister:
thumb.gif
Man what a lot of work! It's looking really sweet Gus. With the new colors have you thaught about a new name?
New name for the boat or my screen name?
The boat is named "checkedout"
I have the smae screen name since about 2002 when I got the boat. May have to stick with it.
 
Spent the day cutting plywood and laying glass. I have both seat boxes locked down and the fist layer of glass. The rear seat mount is glued down and still needs to be glassed. Oh the fun.
 
Just spent a few hours going back over this thread and installing the pictures. I had them hosted at a free host site that must have gone belly up as they are no longer around and all the links where lost. Talk about major flash backs.
 
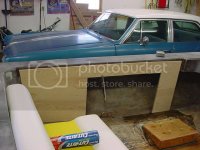
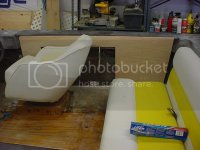
Decided today that I needed a break from sanding and glassing. Got the rear seat locked down and set in the right position. Figured it was time to make the side panels.
The rear portion of the panel will have a padded arm rest complete with cup holder. I am hopping this will give the illusion of a much wider seat as well as giving a place to set the old arm. Or as the wife calles it. A place to rest you head when trying to get a tan.
The front comes down that far because on the drivers side I am mounting the shifter a bit lower. The whole panel with be padded and covered in arctic white vinyl with the black piping.
2-25-06interiorsidepannels2.jpg
2-25-06interiorsidepannels.jpg
 
I like the idea of puting the side walls in I did that in my G-W Invader I had. I used Luon plywood it's 1/4 in thick at the most, got the idea from the van-conversion company I worked for it has poly-fibers in the center very flexible, it looks GREAT ( Custom is the way )
icon_cool.gif
 
Back
Top