• Welcome to the Checkmate Community Forums forums.

    You are currently viewing our boards as a guest which gives you limited access to view most discussions, articles and access to our other FREE features.
    By joining our free community you will be able to:

    » Interact with over 10,000 Checkmate Fanatics from around the world!
    » Post topics and messages
    » Post and view photos
    » Communicate privately with other members
    » Access our extensive gallery of old Checkmate brochures located in our Media Gallery
    » Browse the various pictures in our Checkmate photo gallery

    Registration is fast, simple and absolutely free so please, join our community today!

    If you have any problems with the registration process or your account login, please contact support by clicking here or by using the"contact us" link at the bottom of the page.

Sam I am's 89 Starliner Restore (Discussion Thread)

Status
Not open for further replies.
Progress!

Decided to remake the transom 2" taller tonight. Took me about 1 hour since I simply traced the old one and added 2" to the height. I was able to run the new transom through the table saw and take off material around the edges here the factory built up the hull when laying the hull. I also discovered that you can shape this material with a hand plane, which really led to a nice fit and a lot less mess then sanding. After I got done shaping I ran the transom around my router table with a 1/2" round over bit. A little more sanding and she's done.

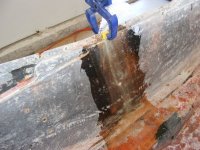
Also, I repaired the crack in the stern with epoxy and two layers of heavy interwoven glass on the inside of the crack. After I got that repair finished I set about making my transom clamps per the plans the cmpulse posted up...although they might be old hickory's plans. Anyway, they should work like a champ. After the transom is in I'll them repair the exterior of the stern and glass over the entire stern.

Tomorrow, the transom will get cab-o-silled in. My plan is to mix the cab and the resin first and then add hardener after I get the right quantity and consistency of paste. Clamp the transom, fillet the edges and base...go to lake and drink BL Lime and try to trick a fish or two.
 
There is only one way to describe what just took place in my garage:


GONG SHOW!!!!!


F*#k me running. What a circus. Anyway, for better or worse, the MOFO is in. I will be expoxy glassing the ever lovin' $h!t out of the entire affair and that should slam dunk it. The skin of the stern is so hot from the epoxy curing I can't even touch it. It's that hot! Hope it doesn't start on fire. I'll be hanging and keeping an eye out for for smoke for a while. It's only 10:30 am and I'm seriously considering a drink. I needed a third arm for this eveolution! My dry run went smooth last night, but when the pot life is ticking...STRESS! I've lost engines going into the back of the ship at night in my helo, walked up and high fived death about a dozen or so time in my life (I even slapped him on the ass once and said, "Good Game!" just so it wouldn't feel gay) But epoxying that hull was a serious amount of "oh ****".
 
I went back out and adjusted the clamps...as I was doing that I realized I would be glassing the entire stern anyway to repair the crack on the outside, so I I grabbed my drill and and ran about 8 screws right through the hull into the transom. That got the epoxy to squirt out the edges...which made me feel better. So...all in all, I'm happy.
 
Got the fillets around the edges of the transom done...no time for pics. I'm using A LOT of cabosil. It takes a lot to thicken the resin up.
 
Got the fillets around the edges of the transom done...no time for pics. I'm using A LOT of cabosil. It takes a lot to thicken the resin up.

Yes you can go through a lot with the transom work. I think after finishing my transom everything else has gone very smooth & easy. Transom was a pain in the a**!

Eric
 
I swear I took more pics than 4...

...anyway, the good thing about being home by yourself is that you can get a lot done! But, if you're working with resin...it's not easy to find a place to take pics.

Crack repair. I used mat on this with the strands woven together perpendicular. It was very easy to wet out and virtually disappeared.

DSCF3001-3.jpg

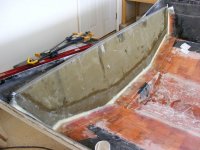
Transom installed, fillets complete and tabbed in. I used the 1708 Bi Ax for tabbing in. Much harder to wet out as there is a lot more material there. Even thought it's completely saturated it did not disappear like the interwoven. Doesn't matter...the only ones who will see it are you freaks.

DSCF3002-5.jpg
 
I did some research on why my pots and epoxy got so hot and I can only come up with pot size. One of the marine sites said when mixing large pots it will run away. Even if you keep the ratios correct. They said it will be ok for strength and cure. The other problem they said that can result from too much hardener is that it won't cure at all? Is that true? My transom is solid as a rock. I had to use a hammer to remove my transom clamps because the stuff that ran out the holes grabbed on and would not let go. Epoxy is strong stuff!
 
Sam are you using US Composites Epoxy & if so Medium 3:1 ? I have been using that with great results. Have noticed though once the air temp gets near 80 degrees you need to work fast, like in 20 minutes or less. Cabosil is a pain to mix in large batches are that 20 minutes goes really quick. I use the stop watch on my iPhone to keep time. Gives me a warning alarm when I have 5 minutes left in the 20 minutes.

Eric

that's exactly what i'm using. and you're right...it was 94 in my garage this afternoon...i was lucky if I had 20 minutes. my only worry about the whole thing is if the fast cure compromises strength.
 
Sam how does the crack/split on the transom look from the outside? Did you test fit the deck to make sure it goes on without a fight?:D
 
No test fit yet. The crack looks good from the outside. I haven't done anything on the exterior yet. I will be grinding down the crack, glassing in with cab and then re-glass the entire stern with biax.

I laid a piece of flooring down for mock up and to come up with a viable way to take true measurements for stringers...just doing that got me charged up. There's going to be a lot of screwing around, but I can see a light at the end of the tunnel as far as the ugly stuff is concerned. Don't get me wrong, there's a long waaaaays to go, but taking the first step and installing the transom took a lot of the doubts out of my mind.

Anyone thinking about doing this, pull the trigger. It's not that hard if you have a place to work.
 
She's gonna look sweet when you're done!!! I know it's along way off but have you decided on gelcoat or paint for the boat?
 
94 degree's :eyecrazy:, no wonder why you have less than 20 minutes pot life. I believe the 23 minutes on the 3:1 medium is at 70 degrees or there about. I am fortunate enough that all my work has been done under 80 degrees so far.

Eric
 
When I got done filleting the transom I stuck the plastic putty knife I was using in the excess still int he bucket. After about 3 minutes I could smell something and my putty knife was melting! No kidding. The bucket was smoking it got so hot. I put it out in the driveway before it burst into flames...couldn't believe the heat.
 
I laid a piece of flooring down for mock up and to come up with a viable way to take true measurements for stringers...just doing that got me charged up.

Sam,

By using a 4' level across the bottom of the hull you will get all the dims you need for the first 9' to 9-1/2' from the transom. You can use an adjustable square to get the vertical height of the stringer at the width you need to match the original ski locker dims. You can mark the width on the level with masking tape to make it go quick.

Jim

Thanks Jim! Yep. I was playing around with that technique as well. I laid in a sheet to see how it would fit and if that would give me a better idea. What I found out was exactly what you said...a level will work just fine. What I also found out is that my sheet material is 50"x96". So I'll have to true those up. Also, I could have gotten by with 2 sheets of flooring. Not sure why I bought 5 :eyecrazy:. I'm sure as heck not going to restore 3 boats!
 
Status
Not open for further replies.
Back
Top