-
Welcome to the Checkmate Community Forums forums.
» Interact with over 10,000 Checkmate Fanatics from around the world!
You are currently viewing our boards as a guest which gives you limited access to view most discussions, articles and access to our other FREE features.
By joining our free community you will be able to:
» Post topics and messages
» Post and view photos
» Communicate privately with other members
» Access our extensive gallery of old Checkmate brochures located in our Media Gallery
» Browse the various pictures in our Checkmate photo gallery
Registration is fast, simple and absolutely free so please, join our community today!
If you have any problems with the registration process or your account login, please contact support by clicking here or by using the"contact us" link at the bottom of the page.
You are using an out of date browser. It may not display this or other websites correctly.
You should upgrade or use an alternative browser.
You should upgrade or use an alternative browser.
Yellowfiero's playmate resto!
- Thread starter yellowfiero88
- Start date
yellowfiero88
Well-known member
Got the transom plate back and bolted all up. I still need a new trim pump before I can hang the motor on there.

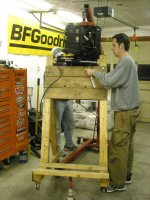
Off the stand and almost ready to mount. My buddy Evan in the background doing all the heavy lifting since I still cant lift much.

Started installing the steering system as well.
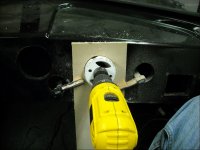

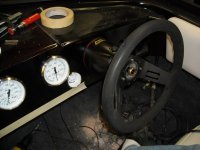
Also have bulkheads for where the lines go through the splash well.

I still need to get the stainless braided lines made from the bulkheads to the cyl.
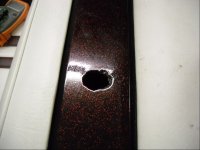
Also got the gauges drilled and ready to mount.

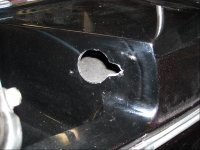
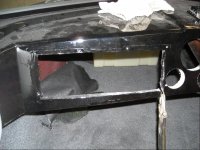
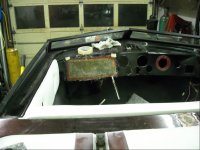
I got several places that will get glassed back in like the original hole for the wiring in the splash well, there is a hole behind the seat, and the glove box will be glassed and a radio installed in its place.

Off the stand and almost ready to mount. My buddy Evan in the background doing all the heavy lifting since I still cant lift much.


Started installing the steering system as well.


Also have bulkheads for where the lines go through the splash well.

I still need to get the stainless braided lines made from the bulkheads to the cyl.
Also got the gauges drilled and ready to mount.

I got several places that will get glassed back in like the original hole for the wiring in the splash well, there is a hole behind the seat, and the glove box will be glassed and a radio installed in its place.
john lamon
Well-known member
Looks good, as always top notch work YF
hotdaddy27
Well-known member
Hey YF,
Did you make the transom plate so big for any particular reason?
I am not criticizing, simply inquiring.
Maybe I missed it.
Thanks.
HD
Did you make the transom plate so big for any particular reason?
I am not criticizing, simply inquiring.
Maybe I missed it.
Thanks.
HD
yellowfiero88
Well-known member
I had that plate already in my dads garage. I just did not feel like cutting it down so I kept it the same size. To be honest, the transom is in great shap and I prob did not even need the plate but better safe than sorry.Hey YF,
Did you make the transom plate so big for any particular reason?
hotdaddy27
Well-known member
Cool!
yellowfiero88
Well-known member
yellowfiero88
Well-known member
Reed
Active member
Very cool, makes me dream of spring already....( my garage still needs the insulation finished ) so I can't play like you are this winter . I will just enjoy reading about your toys till spring breaks lol
I to say I wish I had a little helper like your son, he looked like he was enjoying dads ~ toys~ Keep up the great work

I to say I wish I had a little helper like your son, he looked like he was enjoying dads ~ toys~ Keep up the great work

yellowfiero88
Well-known member
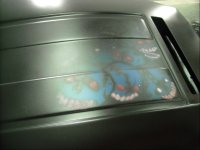
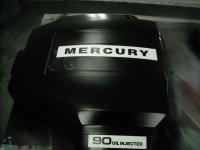
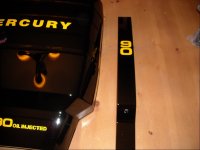
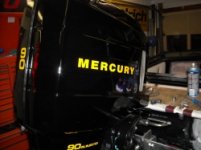
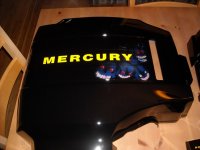
So the past week I have been toying with painting the engine covers. Nothing over the top but I did not want any vinyl decals on them. I started off stripping the old stickers off. That was the start of what would turn into a major project. The stickers took the paint with them so I had to strip everything and primer it all up. From there I sealed it and based in some blue then black laying the base for my graphics. From there I came back with the airbrush with black, white, and red.
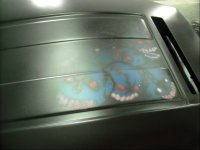
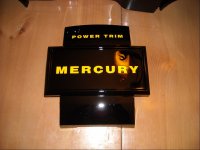
I had some reverse cut vinyl made of the mercury, 90, oil injected, and power trim so that part would be easy. I laid it out and masked it all up painting all the letters yellow.
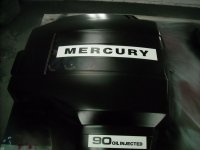
I then removed the masking and laid out 3 layers of clear over it all. I wanted the graphics to be soft and kind of blend in but slightly pop in the sunlight. I have done better work than this but was having a lot of problems out of my badger airbrush pulsating. I think when I do the boat next winter, I am going to break down and buy an Iwata airbrush. Nothing worse than a tool not working like it should.
And yes I am going to go back and fix the one guys eye LOL
LOL

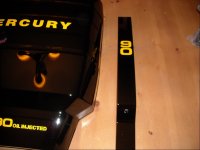
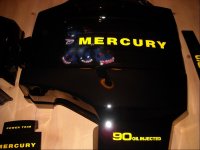
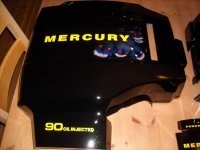
I still have to stripe it and add the pupils

I had some reverse cut vinyl made of the mercury, 90, oil injected, and power trim so that part would be easy. I laid it out and masked it all up painting all the letters yellow.

I then removed the masking and laid out 3 layers of clear over it all. I wanted the graphics to be soft and kind of blend in but slightly pop in the sunlight. I have done better work than this but was having a lot of problems out of my badger airbrush pulsating. I think when I do the boat next winter, I am going to break down and buy an Iwata airbrush. Nothing worse than a tool not working like it should.
And yes I am going to go back and fix the one guys eye


I still have to stripe it and add the pupils

Reed
Active member
Awesome!!!!!!So the past week I have been toying with painting the engine covers. Nothing over the top but I did not want any vinyl decals on them. I started off stripping the old stickers off. That was the start of what would turn into a major project. The stickers took the paint with them so I had to strip everything and primer it all up. From there I sealed it and based in some blue then black laying the base for my graphics. From there I came back with the airbrush with black, white, and red.
I had some reverse cut vinyl made of the mercury, 90, oil injected, and power trim so that part would be easy. I laid it out and masked it all up painting all the letters yellow.
I then removed the masking and laid out 3 layers of clear over it all. I wanted the graphics to be soft and kind of blend in but slightly pop in the sunlight. I have done better work than this but was having a lot of problems out of my badger airbrush pulsating. I think when I do the boat next winter, I am going to break down and buy an Iwata airbrush. Nothing worse than a tool not working like it should.
And yes I am going to go back and fix the one guys eyeLOL
I still have to stripe it and add the pupils


 I love the custom hood idea, I want to learn to do art like that ~ how much for lesson? ~ I like watching and learning
Last edited:
yellowfiero88
Well-known member
I like to share what I can do. The best way to learn is buy the dvd and watch someone that knows how to do it do it like Craig Fraser. (I used his skullmaster template kit then freehand over it). Then pick up a airbrush and a junk hood and play. I still don't know what I am doing but learn every time I try. When I do the boat next winter, your welcome to come and learn. There will be a lot of airbrush and graphic work on it.Awesome!!!!!!
I love the custom hood idea, I want to learn to do art like that ~ how much for lesson? ~ I like watching and learning
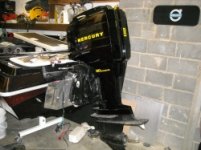
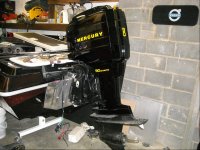
Tonight I got restless so I went out and got the stater and trigger replaced. It now has spark and should run once I get the rigging hose and hook it all up. I also got the lower unit mounted and made sure it will work before painting it as well. BTW, I got this motor for almost nothing because it had no ignition(bad stator) and the lower unit had a crack in it that was JB welded up a few years ago. I hate to say it but the original case is better shape than the replacement that has been painted 3x and has skeg damage(seller said nothing about the skeg damage or that it was painted 3x
 )
)Here is something that is bugging me. I replaced the trim motor and pump with a new aftermarket one. The motor leaked water and was shot so I replaced both so I did not have to worry about the pump down the road. Now it is leaking off. No external leaks, it just creaps down really slow. I used SAE40W oil in it as the manual said(oil removed was ATF or atleast red) ANY IDEALS????? I am going to make a post about this in outboard tech area also.
And since




john lamon
Well-known member
Holy what a change, let me know when I can send ya my mota
yellowfiero88
Well-known member
Made the hydraulic hoses tonight for the steering. Also touched up the body spot where the old rigging came through the splash well. Its nothing much since its getting painted next winter, I just spray painted it back black!!!
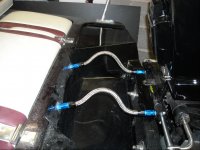
On a side note, I got the rigging hose and its a lot more rigid than I thought . It will not make the bend and work so back to the drawing board for that. I did get the fuel filter/water separator so I can finish the fuel system.

On a side note, I got the rigging hose and its a lot more rigid than I thought
yellowfiero88
Well-known member
No. If I had your gill bracket then yes it would!!! I want them mounted between and inline with the hydro lines. The splashwell is just to small and I dont have enough room to get the extra hose I need so the motor can turn and tilt. 1 option is to mount the rigging hose to the access cover lid and I dont think I like that ideal. I am going to look for a smaller hose or one that is more flexable. I wish I knew it was so stiff before I spent almost $80 for it. Also keep in mind the hydro lines are only 12" long and that is with the bends in them, that gives you an ideal of splashwell size.
I hate to admit it but i might be going with a small diamater shop vac hose, altho I could get a SS braiding wrap for it!!!
I hate to admit it but i might be going with a small diamater shop vac hose, altho I could get a SS braiding wrap for it!!!

 !
!

