Before you go the shop vac hose route, try the wrap that was on my motor before. I'm not sure what's called but look at pictures 13 and 14 in my album. http://checkmate-boats.com/forums/album.php?albumid=27
-
Welcome to the Checkmate Community Forums forums.
» Interact with over 10,000 Checkmate Fanatics from around the world!
You are currently viewing our boards as a guest which gives you limited access to view most discussions, articles and access to our other FREE features.
By joining our free community you will be able to:
» Post topics and messages
» Post and view photos
» Communicate privately with other members
» Access our extensive gallery of old Checkmate brochures located in our Media Gallery
» Browse the various pictures in our Checkmate photo gallery
Registration is fast, simple and absolutely free so please, join our community today!
If you have any problems with the registration process or your account login, please contact support by clicking here or by using the"contact us" link at the bottom of the page.
You are using an out of date browser. It may not display this or other websites correctly.
You should upgrade or use an alternative browser.
You should upgrade or use an alternative browser.
Yellowfiero's playmate resto!
- Thread starter yellowfiero88
- Start date
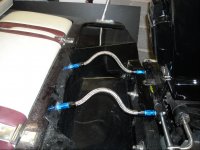
that looks great! does the steel braided move pretty good? i was thinking about doing something like this on my boat.
yellowfiero88
Well-known member
Thanks, Yes it flexes very nice. I was worried with the lines being so short that it would not flex easy but I am very happy with it so far. BTW, there is about $75 in parts with the lines, fittings, bulkheads and SS washers. Not real cheap but love the look. All of the stuff is Earls and can be bought from summit, jegs, or any speed shop. I got mine from Bobs here in Cincy and payed a couple dollars more but I had them in my hand.that looks great! does the steel braided move pretty good? i was thinking about doing something like this on my boat.
john lamon
Well-known member
Before you go the shop vac hose route, try the wrap that was on my motor before. I'm not sure what's called but look at pictures 13 and 14 in my album. http://checkmate-boats.com/forums/album.php?albumid=27
That's called flex sleeving, I had it on my Avenger, it is maybe 1 inch in diameter but will expand up to 4 inchs so it gives it a snug look, it looks really good, cmpulse does that sound like what you had? it's only like a $1.50 a foot but I think you have to buy it in 100' roles, I know my mate dealer has it and will sell it buy the foot.
Attachments
Last edited:
yellowfiero88
Well-known member
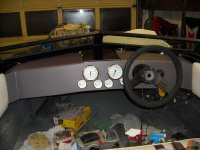
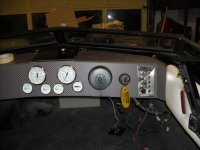
Got the dash wrapped tonight with carbon fiber. Just giving it a try to see if I like it. If I dont, then it will be pealed when the paint work gets done. Got the helm, ignition switch, and some of the gauges mounted as well. Tomorrow I will get it cleaned up, finish mounting and start the wiring.
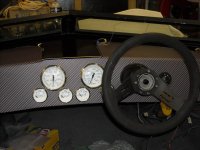
I think I like the look of the dash after all. I will see what I think after I see it for a while

I think I like the look of the dash after all. I will see what I think after I see it for a while
T
TheNerd
Guest
I like the dash, looks great.
yellowfiero88
Well-known member
Gimme Fuel
Well-known member
that dash really looks nice.....I was going to make some carbon fiber panels to accent my dash.....but I might look into the vinyl now......that would be a ton easier and cheaper.
yellowfiero88
Well-known member
Cost wise, it was real cheap. I had the local shop print it but you can also buy it on ebay. I went with the 3D because of the realness of the look compared to the other carbon. Ease of instalation was about a 3 on a scale of 1-10, 10 being the hardest. Its not perfect but then again, I am not a vinyl guy eitherthat dash really looks nice.....I was going to make some carbon fiber panels to accent my dash.....but I might look into the vinyl now......that would be a ton easier and cheaper.
On a plus side, I got the riggin hose figured out
 .
.I trip to the hardware store and to pep boy's "homo-honda ricer isle" got er dun
 LMAO!
LMAO! Shopping list~
2-black iron pipe flange
2-1 1/4" x 4 galv pipe
1- 1 1/2" x 25' sump pump hose(very flexable)
2-SS braided hose wrap kit. (I need 2 of them.)
1- piece of 6061 aluminum
Rivets
1/4" SS bolts, washers, and nuts
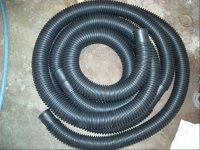
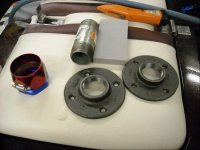
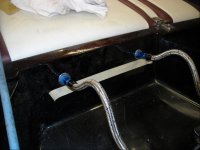

This is what I have come up with so far. I need to order another kit to do both sides. Also make an aluminum bracket to mount the hoses to the motor.

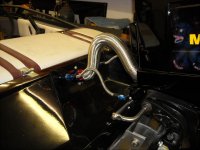
The "fitting" will be blue and black to match, not blue and red.
What ya all think so far?
yellowfiero88
Well-known member
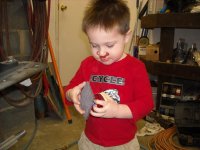
So I got the kids this weekend and my son wanted to go out to the garage. With his help, I got some stuff done today! He was playing on a toy chest lid and using it as a sled at the ex's BF's house and that ended in stitches in his nose so don't mind the bandaid!
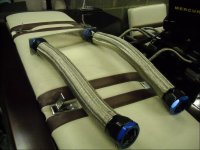
Scuffing the red section so it can be black to match the steering hoses.
In comes the 6061 for the bracket. The "nuts" are riveted to the 6061 in 4 spots per nut. Hopefully this will work!

Hoses attached
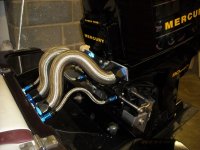
Bracket bolted to the front of the motor and hoses done!
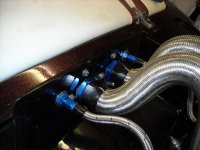
Scuffing the red section so it can be black to match the steering hoses.

In comes the 6061 for the bracket. The "nuts" are riveted to the 6061 in 4 spots per nut. Hopefully this will work!

Hoses attached

Bracket bolted to the front of the motor and hoses done!


yellowfiero88
Well-known member
Yea, he is a DNA clone of me. Loves boats, trucks and the garage maybe even more than I do. This might get costly as he gets older as I know how much I have spent on projects in the past. As for seat time, he already climbs into my lap on the green boat and steers itHave to keep the playmate around now!The boy is banking up his seat time hours.Drivers seat time that is!Looks Good
yellowfiero88
Well-known member
Just finished running all the wiring to the motor and getting it all hooked up. Its always a good thing when you finish and hit the key, it spins like it should !!! The warning buzzer was even going off(didn't work on the 50) I got to trim the cowl a little bit to clear the fuel line and run a temp sender wire but other than that, the covers can go on for good
Next order is the dash wiring, fuel/water seperator, install tank, run the rest of the steering lines and bleed system. Then its ready for a wet test hopefully before the end of the month.
 !!! The warning buzzer was even going off(didn't work on the 50) I got to trim the cowl a little bit to clear the fuel line and run a temp sender wire but other than that, the covers can go on for good
Next order is the dash wiring, fuel/water seperator, install tank, run the rest of the steering lines and bleed system. Then its ready for a wet test hopefully before the end of the month.
john lamon
Well-known member
I like how it turned out, something no one else will have that's for sure.
yellowfiero88
Well-known member
Got the rest of the steering hoses made tonight and bled the system. I installed the fuel/water filter. And last but not least, got the trim wiring working. I had to tear the switch apart because it was all corroded from never being used. Real simple, just took a red scuff pad and cleaned the contacts inside the switch and put it all back together. Another thing that is screwed up is the trim is no longer bleeding off. I think it might have had some air bubbles in the system and the just had to work their way out. Anyway off to the shower as I grabbed a rag to wipe my hands and arms off from the oil and to my surprise I had used it to wipe the fiberglass dust off

Gimme Fuel
Well-known member
That is going to be one sweet little rig YF! Nice job on the rigging.

